
 Halkali merkez neighborhood fatih st ozgur apt no 46 , Kucukcekmece , Istanbul , 34303 , TR
Setting up and managing professional email accounts in your cPanel control panel is now very easy. In this guide, you will learn step by step how to create, configure, and manage your corporate email accounts through cPanel.
A professional email address enhances your business's credibility and strengthens your communication with customers. With corporate email accounts, you can have email addresses with your company's domain name @yourcompany.com.
Create accounts in minutes
Access your emails from anywhere
Protection with security and filters
Manage accounts and quotas
To create an email account via cPanel, you first need to log into your cPanel control panel. Use the information provided by your hosting provider to access cPanel.
Open your web browser and visit https://yoursite.com/cpanel or https://yoursite.com:2083. Your hosting provider might have given you a specific URL.
Enter your cPanel username and password. You should have received this information in an email when you purchased hosting. If you don't remember your credentials, contact your hosting provider.
Once you've successfully logged in, you'll see the cPanel control panel home page. This page contains various tools and modules for managing your server.
Tip: Always use strong passwords and remember to close your cPanel session when you're done. Also, activate Two-Factor Authentication (2FA) if possible for enhanced security.
After logging into cPanel, you can easily create and manage email accounts. Here's a step-by-step process of creating an email account:
Find the "Email" section on the cPanel home page. Click on "Email Accounts" in this section.
Go to the "Create Email Account" section. Here you'll need to choose a username for your new email address and select which domain you want to create it for.

Enter the username (the part before the @ symbol) and a strong password. cPanel automatically evaluates the security level of your password.
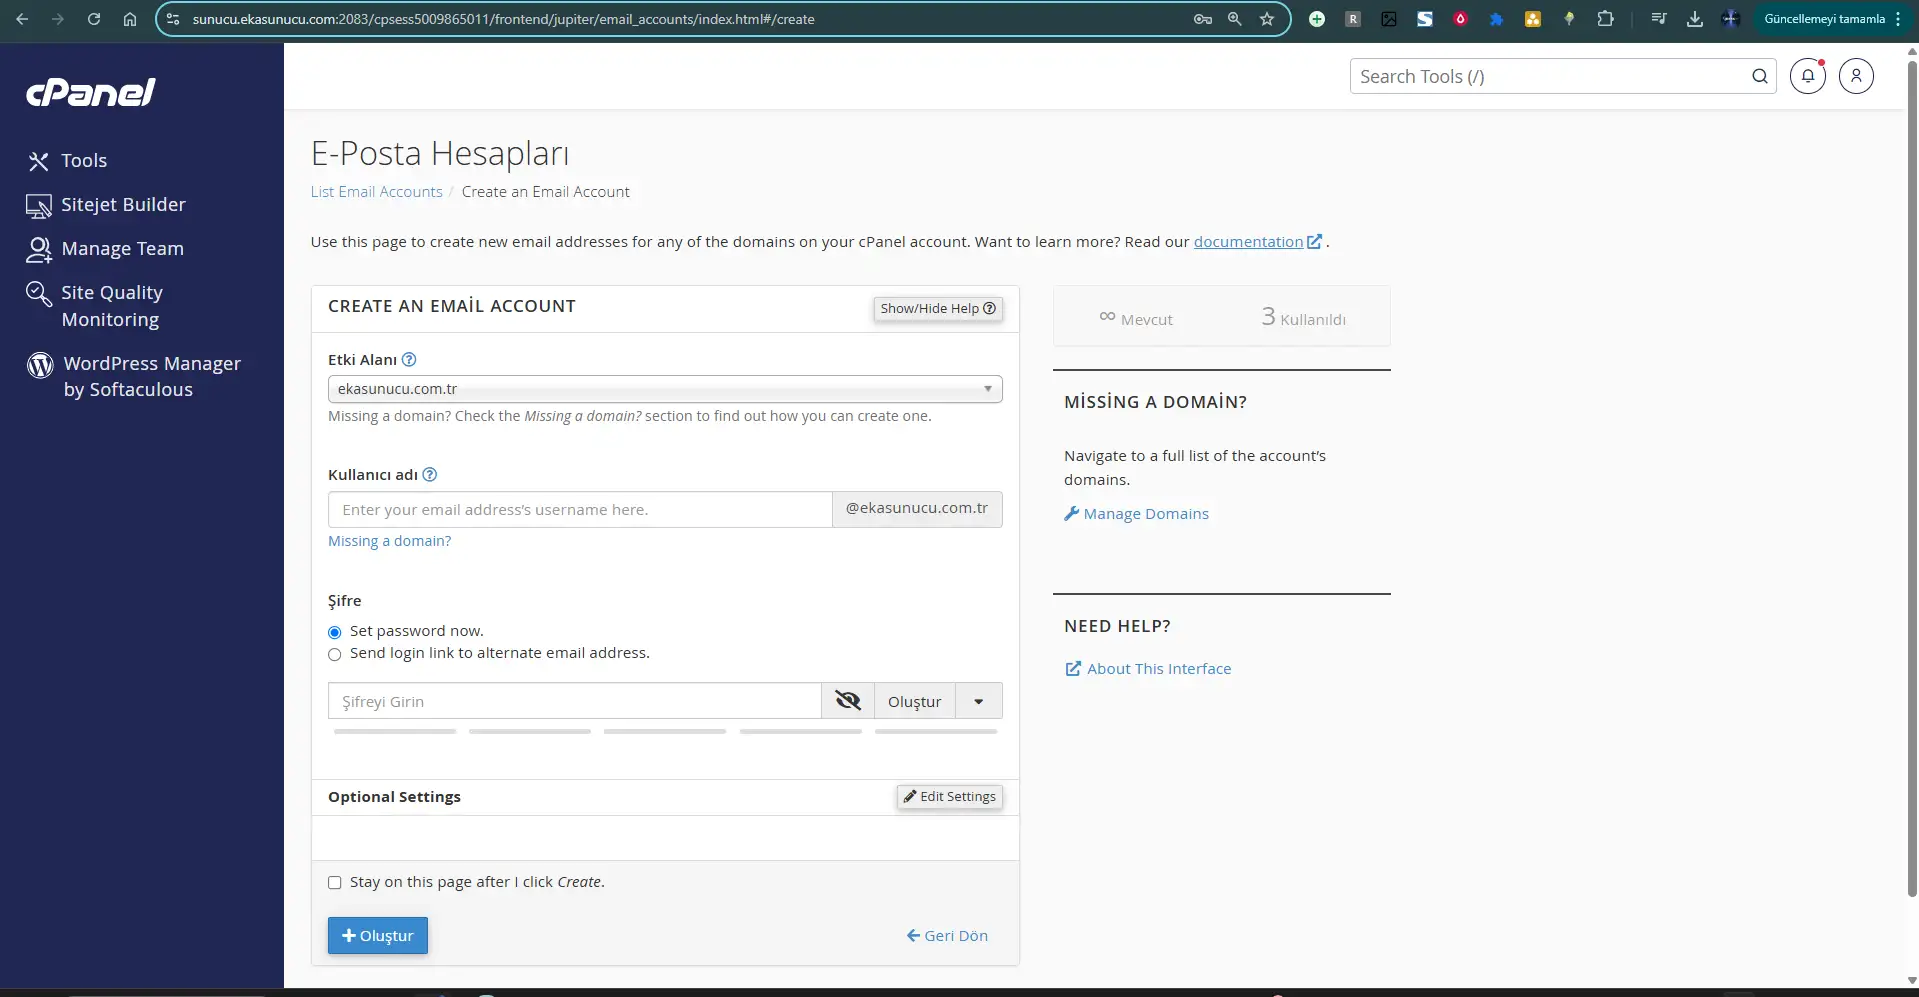
Set a storage quota for your email account. You can mark the "Unlimited" option for unlimited storage or assign a specific MB/GB value.
Click the "Create" button to create your new email account. Once completed, you'll be redirected to the account list page.
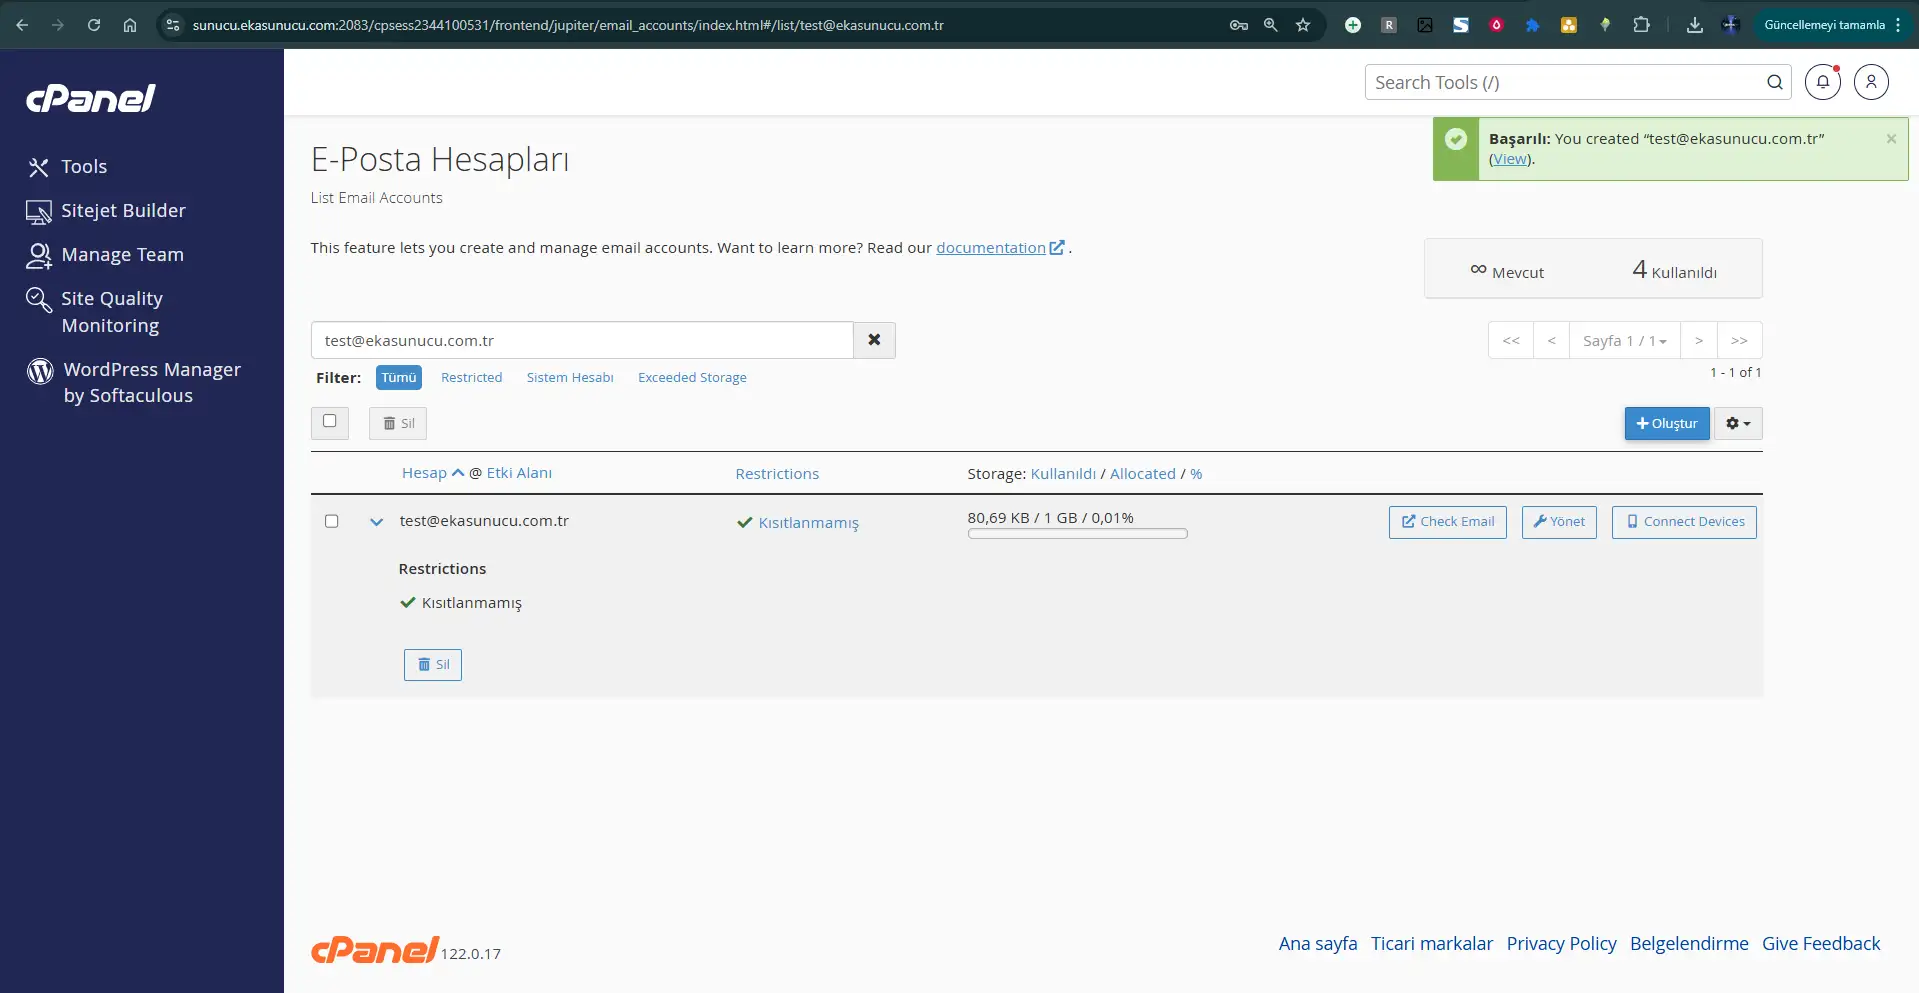
Congratulations! Your email account has been created successfully. You can now manage this account, access your emails through the webmail interface, or set it up on your mobile device. The created email address format is: [email protected]
The successfully created account appears in the Email Accounts list and offers various management options:
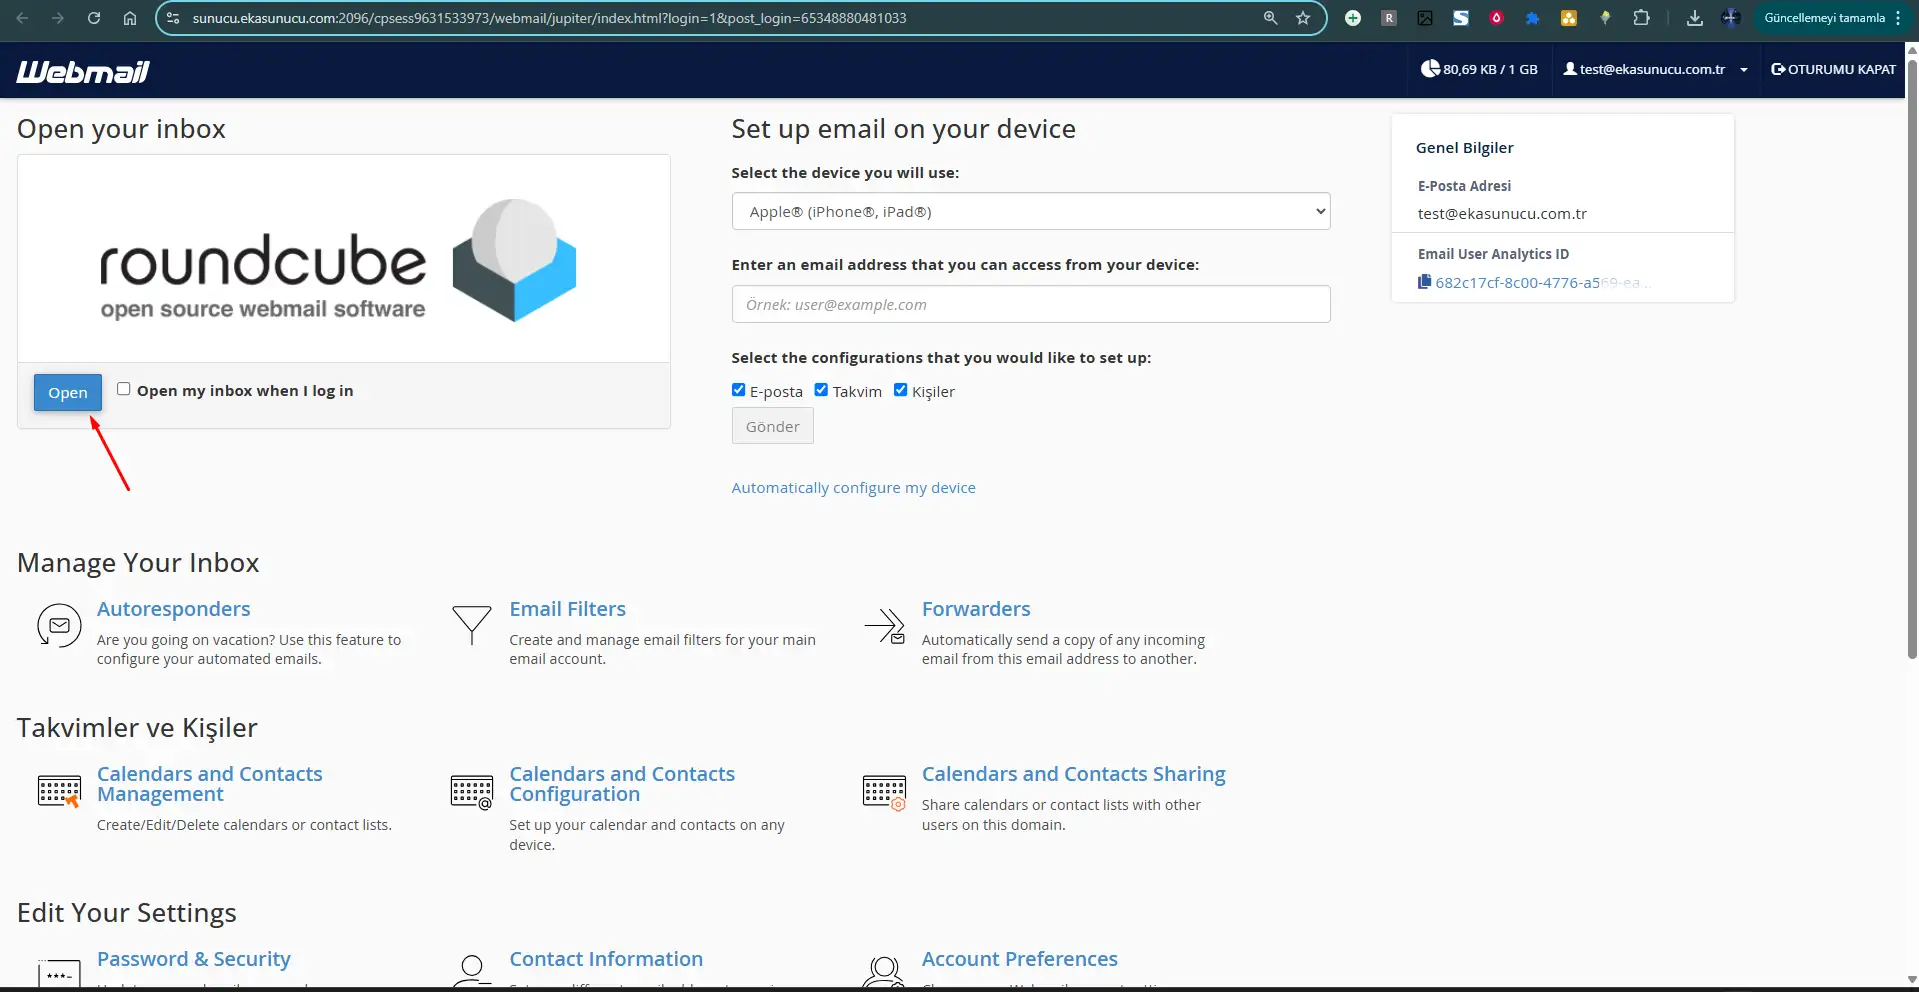
How can you access your email account through your browser?
The webmail interface allows you to access your email account directly through your browser without installing any email client (Outlook, Thunderbird, etc.). You can easily access the email addresses you create in cPanel via webmail.
There are two ways to access webmail:
https://yoursite.com/webmail or use https://webmail.yoursite.com address.cPanel typically offers several webmail clients like Roundcube, Horde, and SquirrelMail. We recommend Roundcube due to its intuitive interface. After selecting your preferred webmail client, log in with your email address and password.
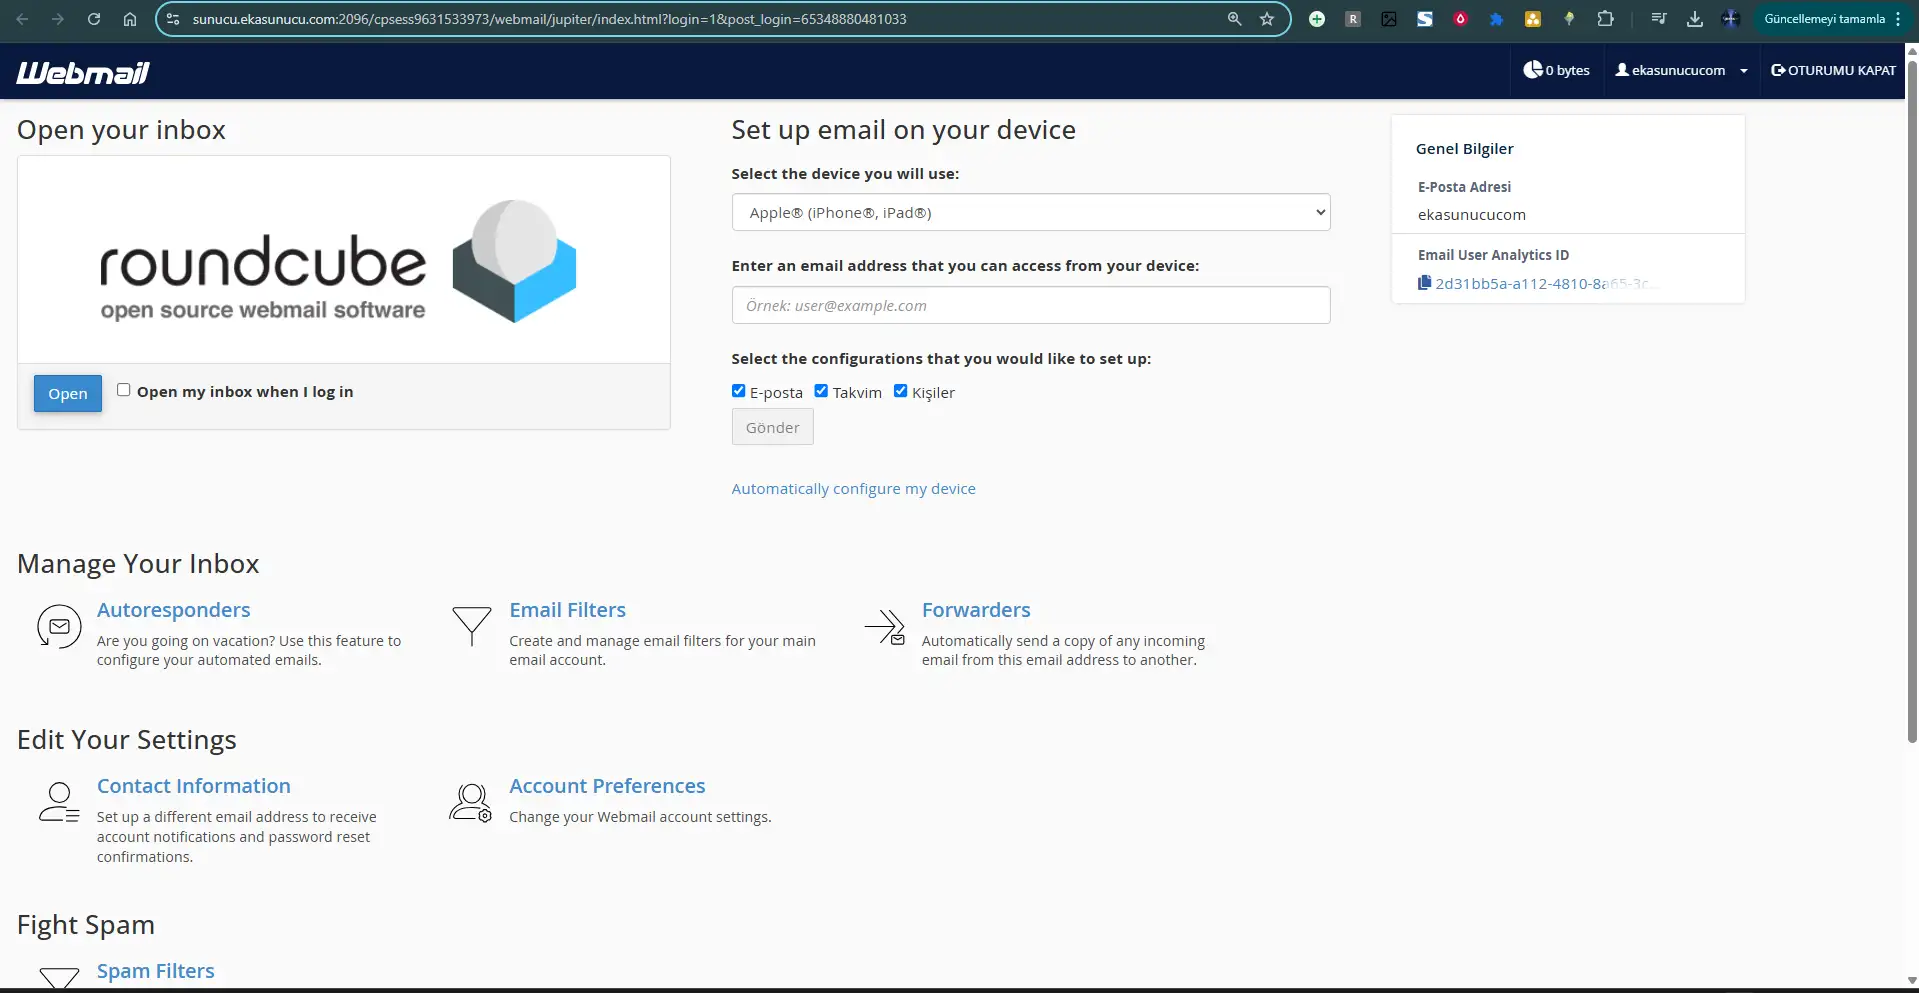
After logging in, you can view, reply to, send new emails and attach files. You can also manage your contact list and create folders.
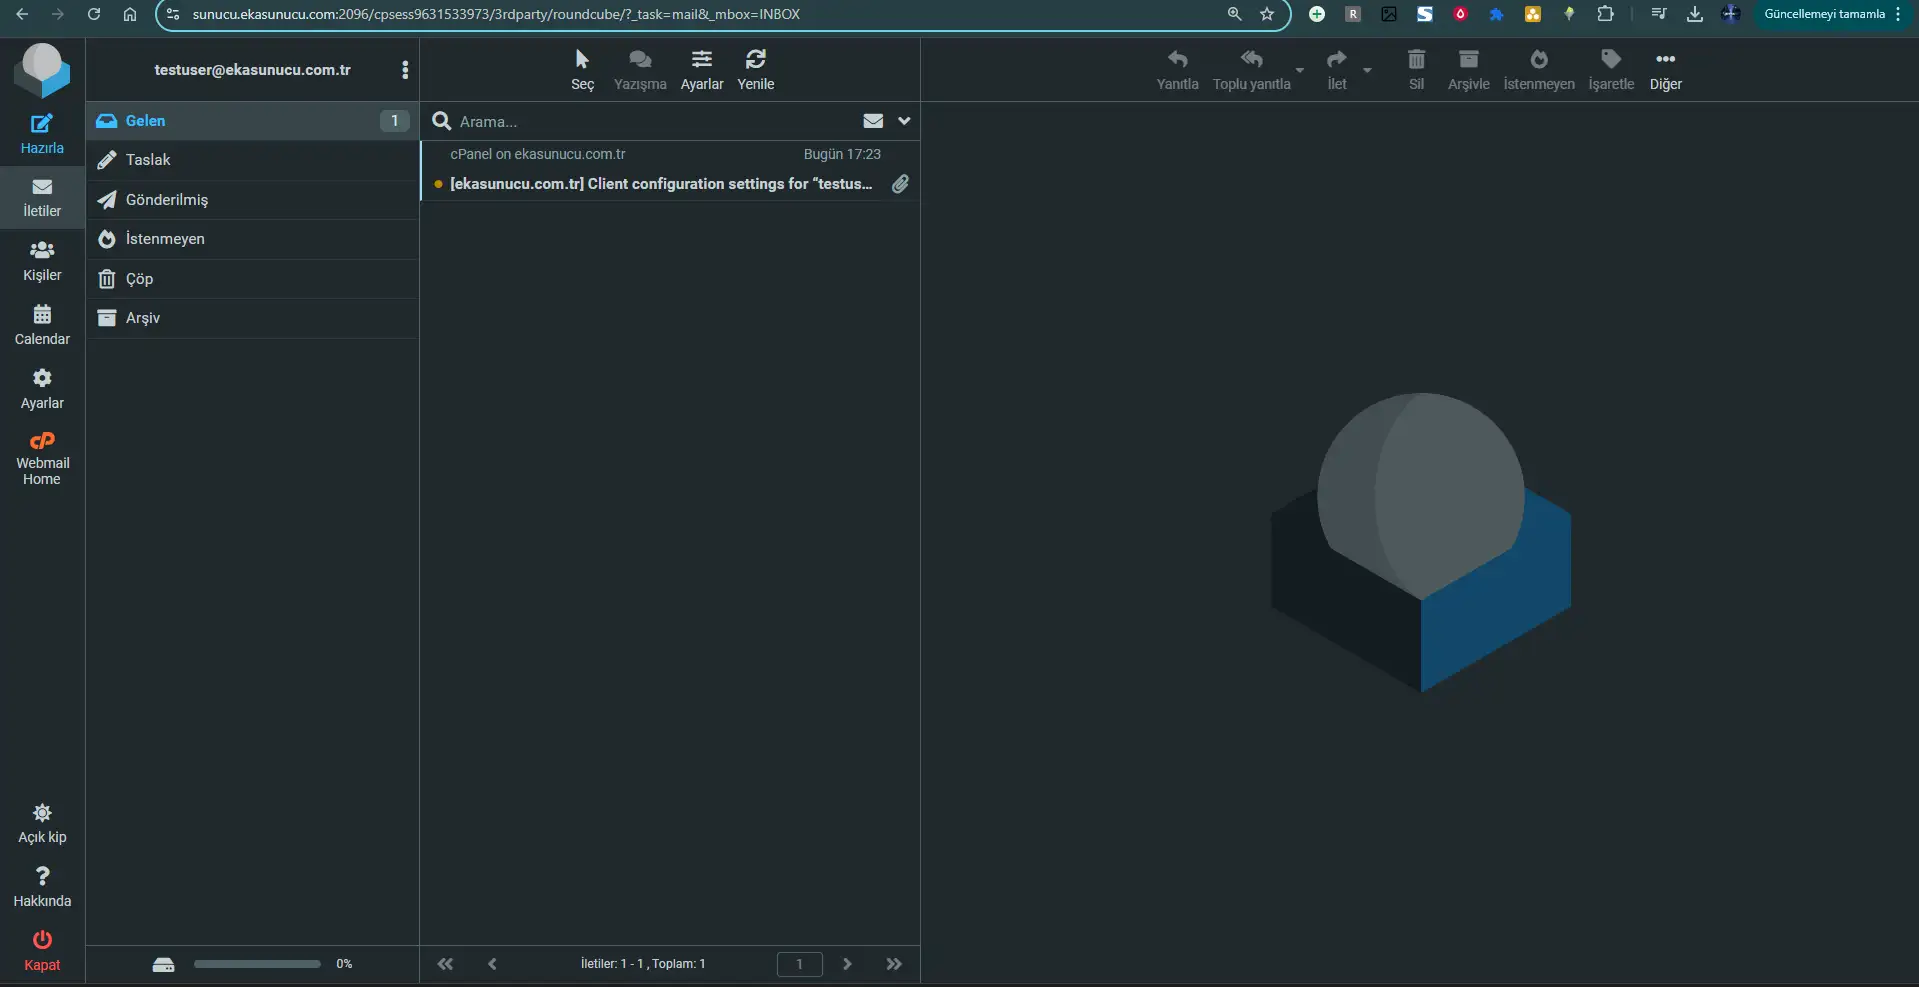
Hint: Tip: Adding your account to email clients via IMAP or POP3 protocols on devices you frequently use may be more practical. However, webmail is useful when you need quick access from any device.
Examples of sending and receiving emails
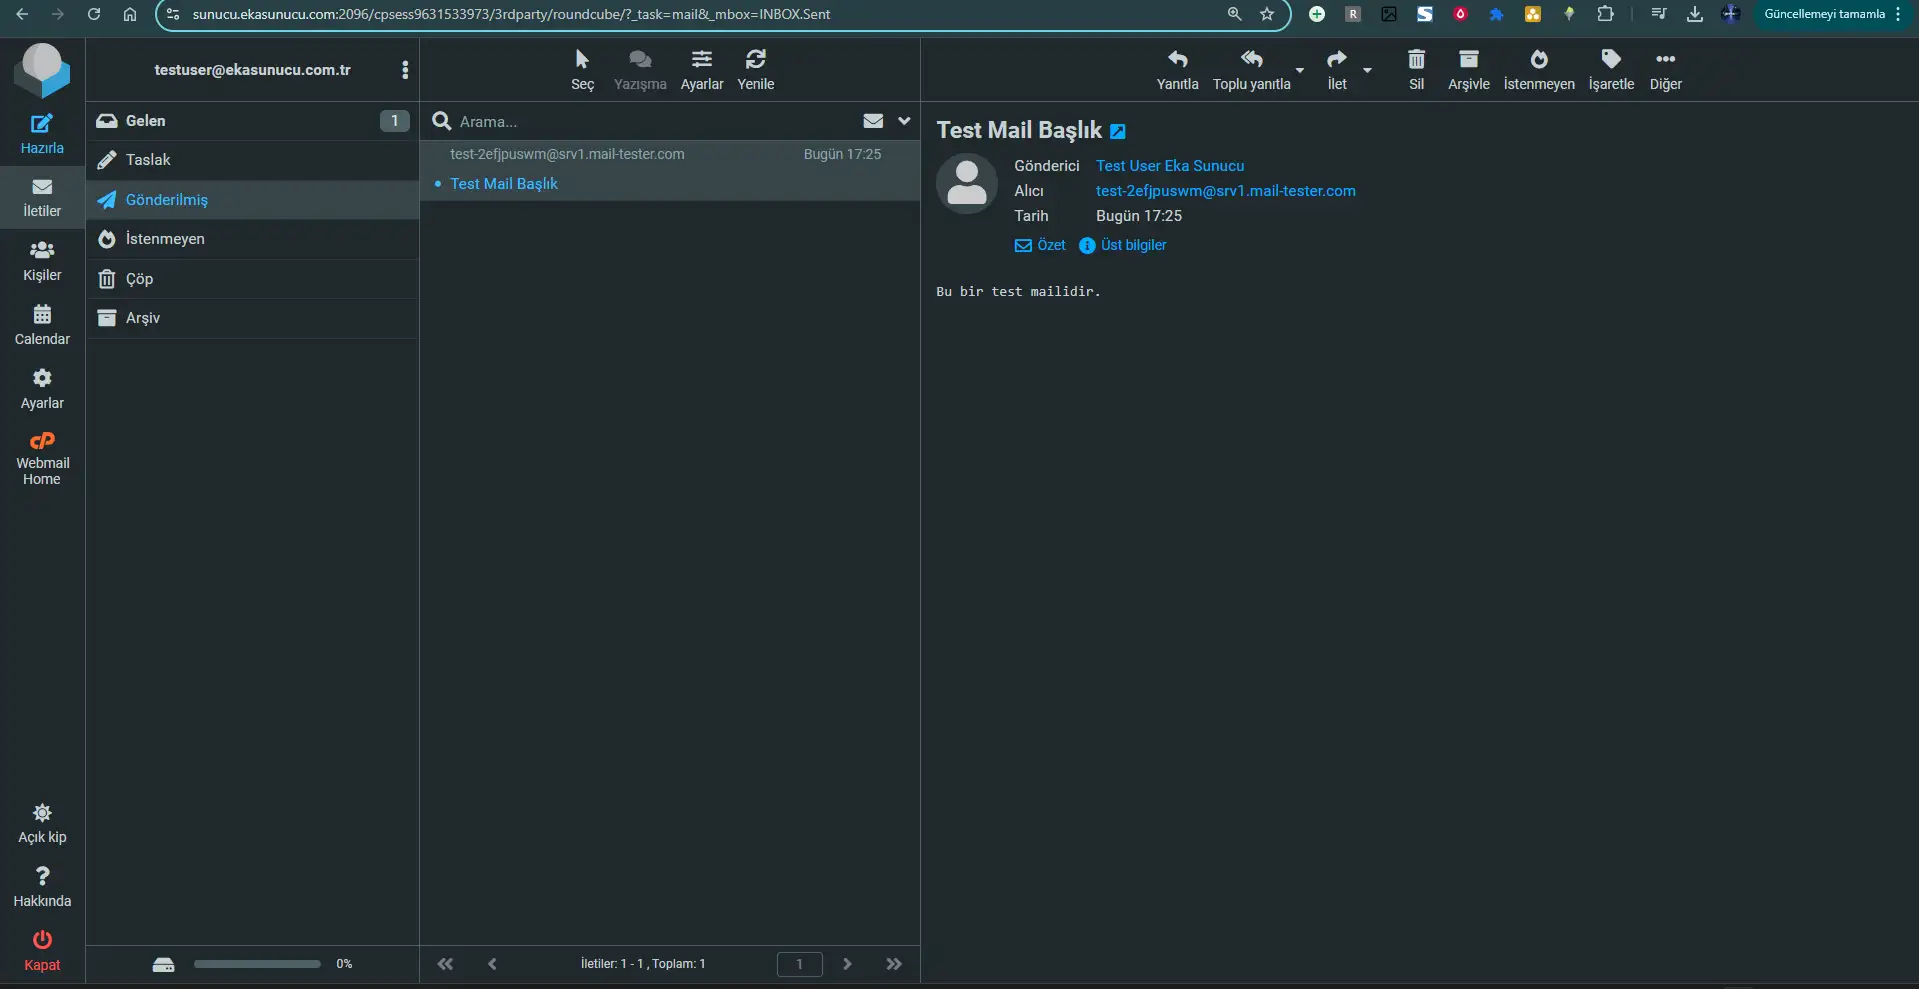
A professional email view sent via webmail.
Attaching and sending files
Rich text editing
Adding professional signature
Using address book
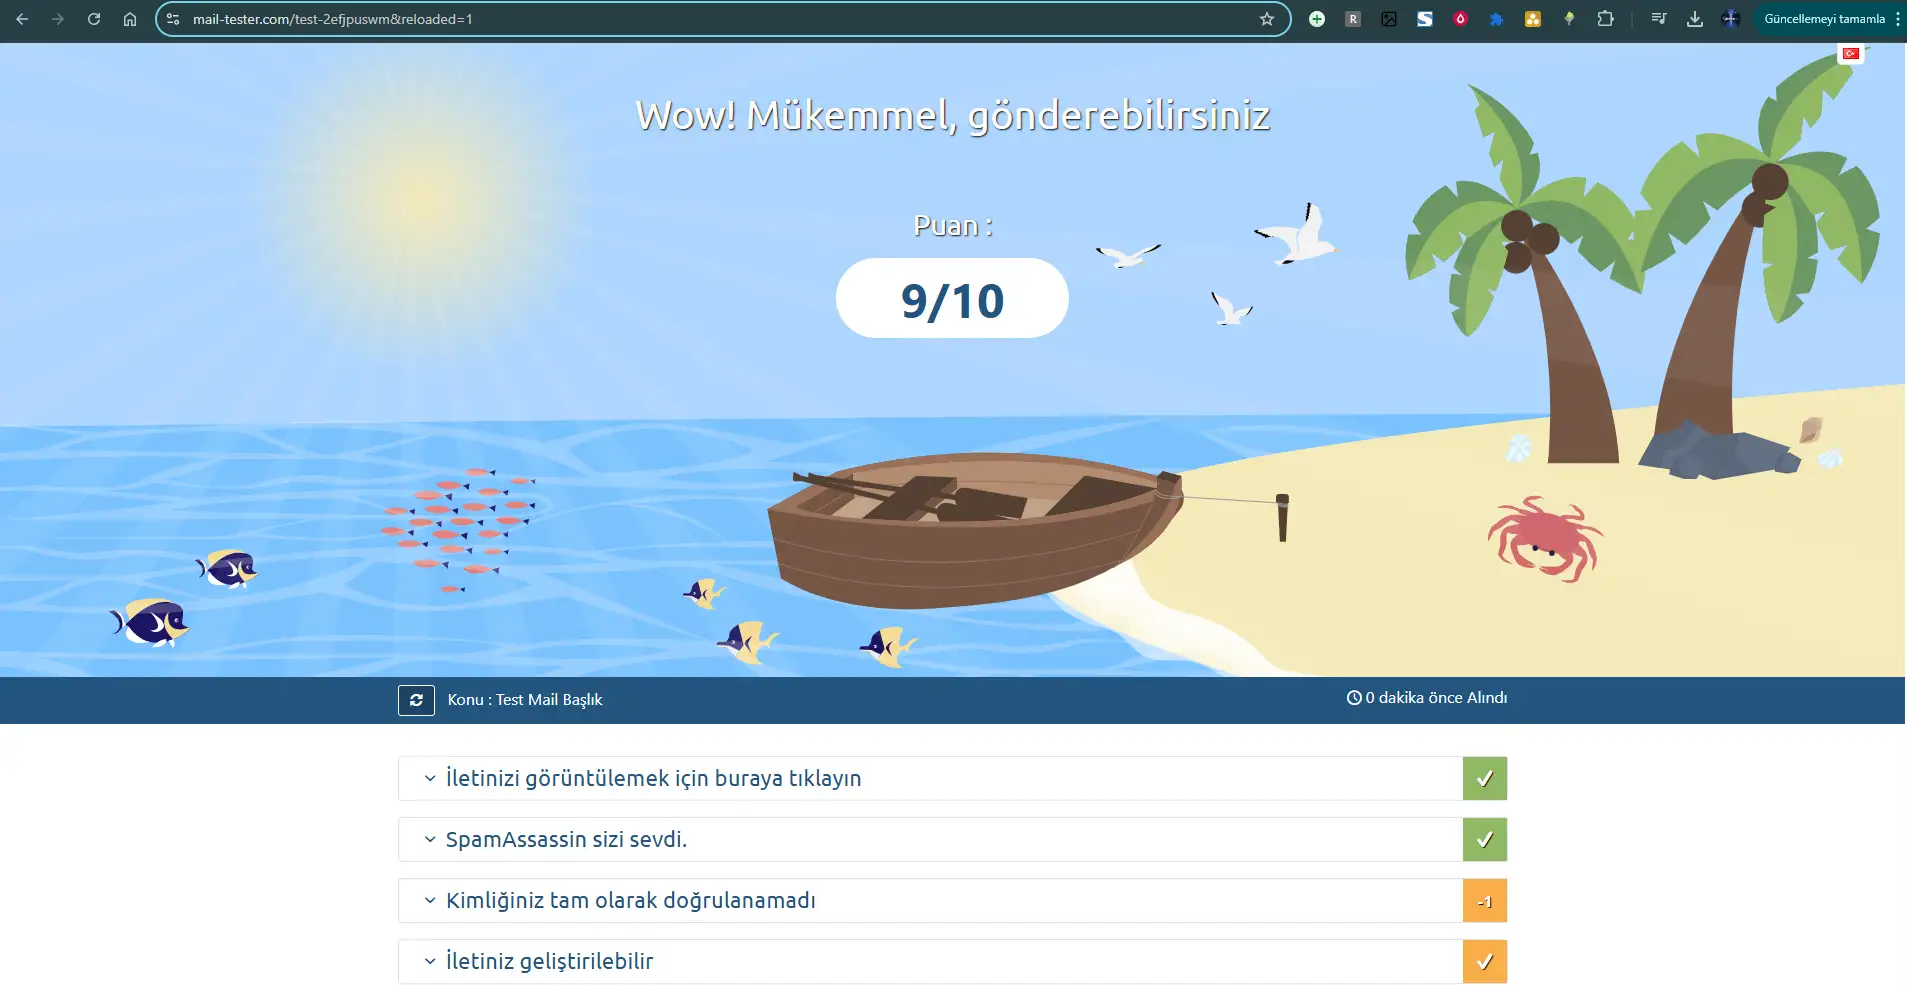
You can check your email reliability with Mail Tester.
IMAP and POP3 settings for email client (Outlook, Gmail, Mobile Mail Apps)
IMAP (Internet Message Access Protocol) keeps your e-mails on the server, allowing you to access them from different devices.
mail.siteniz.com993mail.siteniz.com465POP3 (Post Office Protocol) downloads emails from the server to your device. Suitable for access from a single device.
mail.siteniz.com995mail.siteniz.com465Not: The above settings are a general guide. Your hosting provider may be using different server addresses or ports. Check your hosting provider's documentation or contact support for the correct settings.
Learn how to create cPanel email accounts with step-by-step visual explanation
Most commonly asked questions and answers about email accounts and management
In cPanel, go to the 'Email' section and click on 'Forwarders'. Click on 'Add Forwarder' and select the email address from which you want to forward emails. Then enter the destination email address where you want to forward emails. This way, all emails sent to your domain will be automatically forwarded to the address you specify.
Strengthen your corporate identity with professional e-mail addresses with @yourcompany.com extension. Contact us now for our secure, spam-protected and easily manageable email services.
 Turkey (Turkish)
 Germany (German)
 Worldwide (English)

